Information on using the Scheduled Calls Feature:
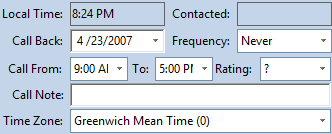
On the "Contacts" screen, define the correct information for your contact. Here you can set the Call Back Date and the Frequency, in case you want to set up an automatic recurrence for the call back. You can also write a Call Note which is some text that will show up on the Scheduled Calls screen to help remind you about the purpose of your call.
The Call From/To and the Time Zone areas work together so that the system can calculate if the contacts' local time is within those times. This feature was put in place so you only spend your time calling people when they are likely in the office.

In your Scheduled Calls screen there are some settings that you must change before you can start using it.
If you right-click on the grid you will see the following context menu:
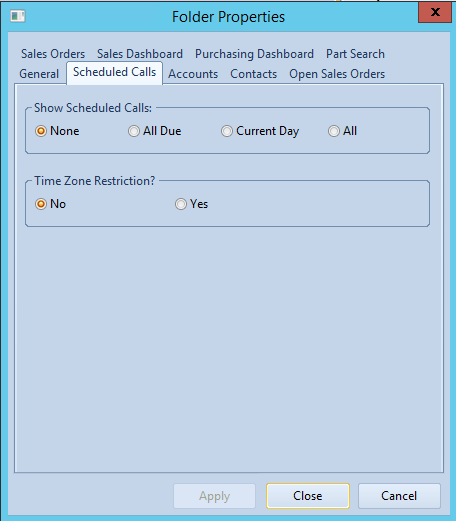
Select Folder Properties and you will see the following dialog:

Here you can choose which calls you want to see:
- None: Will not show any calls (is the default).
- All Due: Any scheduled Call that was set to call today or earlier (Earlier calls will display with red background).
- Current Day: Only Scheduled Calls that you setup for today will show.
- TZ Restriction (Time Zone Restriction): Calls will be shown based on the Time Zone and Call From/To areas are filled out.
- No: Calls will show regardless if the contact local time falls outside the From/To times that you setup in the contacts screen.
- Yes: Only calls which contacts’ local time falls within those From/To times you setup are displayed.
Once you have the list of calls displayed you can either double-click to go directly to the Contacts screen or you can choose to open the Company, Requirements, or Quotes screens.